
Installing QGIS on Ubuntu: a simple and effective guide#

It may sound surprising, but installing the most widely used open-source GIS software on the most popular Linux distribution is still not as seamless as it should be. Even experienced users sometimes struggle with repository configurations, package dependencies, authentication keys and other system administration intricacies.

The challenge isn't just technical. QGIS's official installation documentation, while thorough, can be difficult to navigate for those who aren't developers or seasoned Linux users. Plus, regular updates and changes in the software lifecycle can introduce unexpected hurdles for everyday users.
That said, there's no point in complaining, it’s free software and open-source contributors deserve appreciation, not frustration! And I speak from experience. 
Since I don't install or reinstall QGIS every day, I've put together this guide as a personal reference and to help others. Given that this is a constantly evolving topic, I’ll try to keep this guide updated from time to time. However, feel free to report issues or suggest improvements.
Prerequisites#
- administrator privileges on your system
- an internet connection that allows access to https://qgis.org/ and can handle a 1.5GB download without choking
Choosing the right version#
Before installing, you need to decide: which version of QGIS do you want?
Personally, I prefer opting for QGIS LTR (Long Term Release) (version 3.34.15 at the time of writing) on Ubuntu LTS (Long Term Support) (24.04.1 at the time of writing) using the official QGIS package repository.
Yes, I value stability.
Yes, the ubuntugis-unstable repository lives up to its name.
No, non-LTR versions aren’t stable enough, especially before they reach at least six bugfix releases (the last digit in the version number).
Sure, I don’t get the latest buzzworthy features making the rounds on GIS news sites (like Geotribu). My versions of GDAL and PROJ might be older than my kids… but my setup works™. 
And I can focus on my work without worrying about the next update breaking something. 

Those who install non-LTR QGIS without patch releases
Versions availability
The version of your Ubuntu distribution matters. Not all QGIS versions are packaged for all Ubuntu versions due to dependency constraints. For example, on Ubuntu 20.04, you won’t find QGIS versions beyond 3.22.
Installing dependencies#
First, ensure your system is up to date. Here, we're assuming you’re starting from a fresh system. If your machine is cluttered with old setups, consider cleaning it up before proceeding.
sudo apt update
sudo apt install ca-certificates gnupg lsb-release software-properties-common
Adding the official QGIS repository (PPA)#
The QGIS project maintains an official packages repository (PPA) for Debian-based distributions, including Ubuntu. To use it, we need to authenticate and configure it properly.
Authenticating the repository#
To install anything from this repository, you need to be able to authenticate it to the system.
We start by downloading the PPA's authentication key and storing it in the appropriate system directory:
sudo mkdir -p /etc/apt/keyrings
sudo wget -O /etc/apt/keyrings/qgis-archive-keyring.gpg https://download.qgis.org/downloads/qgis-archive-keyring.gpg
Adding the repository to our list of packages sources#
Now, we add the QGIS repository to our package sources by creating a dedicated file in /etc/apt/sources.list.d/:
echo \
"deb [arch=$(dpkg --print-architecture) signed-by=/etc/apt/keyrings/qgis-archive-keyring.gpg] https://qgis.org/ubuntu-ltr \
$(lsb_release -cs) main" | sudo tee /etc/apt/sources.list.d/qgis.list > /dev/null
Then, verify that the file was successfully written:
Result on Ubuntu 24.04 should be:
Alternatively: the qgis.sources file#
There is another way of referencing the repository in the list of sources: the DEB822 format, which aims to solve issues related to the historical one-liner. Well, don't mind, the information stored is the same, but not structured in the same way. Let's say it's the new way to format packages source files.
In this case, the repository is referenced in a /etc/apt/sources.list.d/qgis.sources file:
echo \
"Types: deb deb-src
URIs: https://qgis.org/ubuntu-ltr
Suites: $(lsb_release -cs)
Architectures: amd64
Components: main
Signed-By: /etc/apt/keyrings/qgis-archive-keyring.gpg" | sudo tee /etc/apt/sources.list.d/qgis.sources > /dev/null
Then, verify that the file was successfully written:
Result on Ubuntu 24.04 should be:
echo \
"Types: deb deb-src
URIs: https://qgis.org/ubuntu
Suites: $(lsb_release -cs)
Architectures: amd64
Components: main
Signed-By: /etc/apt/keyrings/qgis-archive-keyring.gpg" | sudo tee /etc/apt/sources.list.d/qgis.sources > /dev/null
Then, verify that the file was successfully written:
Result on Ubuntu 24.04 should be:
Installing QGIS#

With everything set up, we can now install QGIS!
First, update your package list:
To see available QGIS-related packages, start typing sudo apt install qgis and press Tab for autocomplete suggestions.
$ sudo apt install qgis
qgis                      qgis-plugin-grass-common  qgis-server-common        qgis-server-wms
qgis3-survex-import       qgis-provider-grass       qgis-server-dummy         qgis-server-wmts
qgis-api-doc              qgis-providers            qgis-server-landingpage   qgis-sip
qgis-common               qgis-providers-common     qgis-server-wcs
qgis-dbg                  qgis-server               qgis-server-wfs
qgis-plugin-grass         qgis-server-bin           qgis-server-wfs3
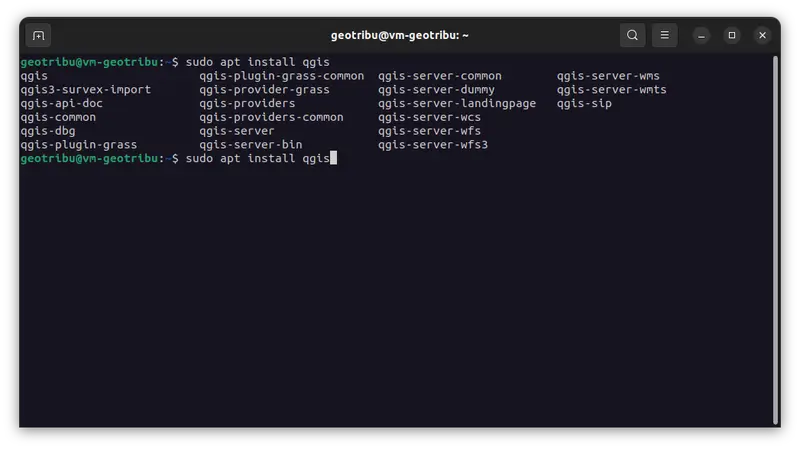
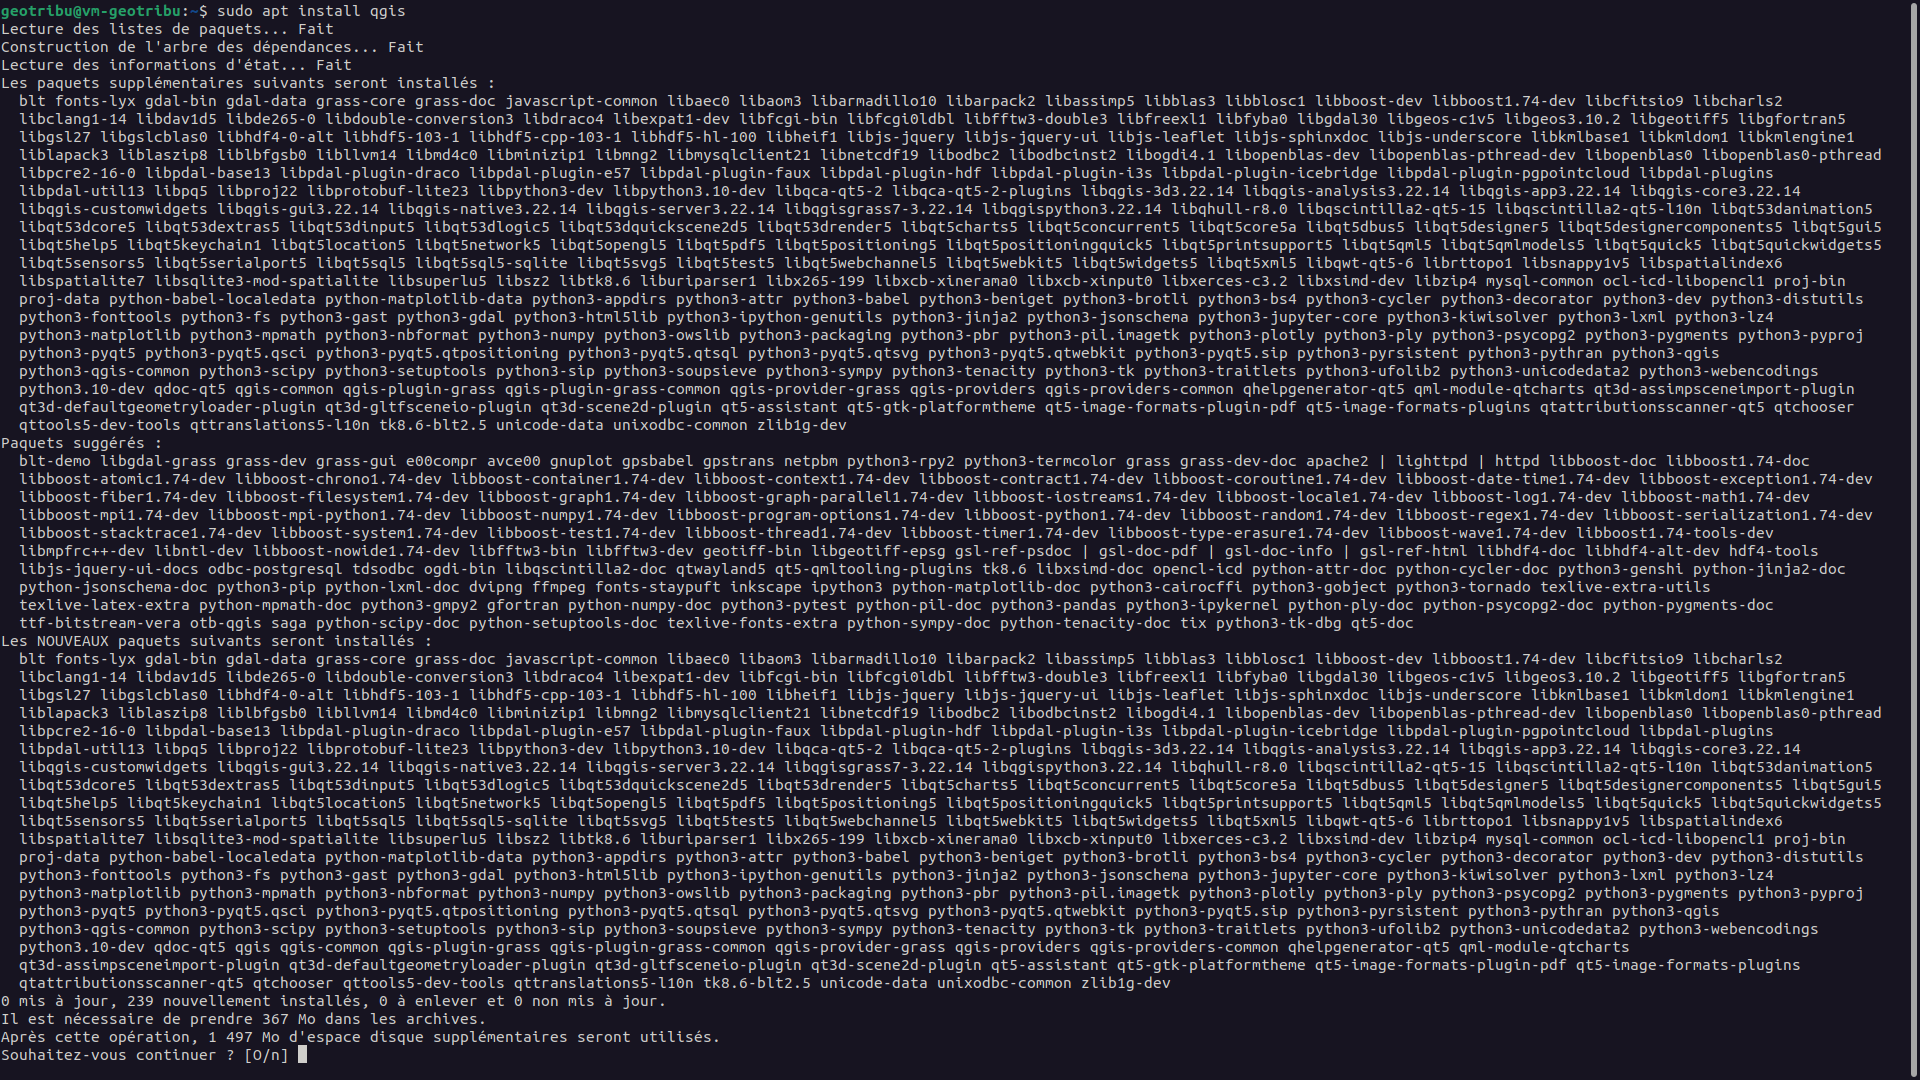
Unless you have special needs, it's always best to install only the minimum required. In my case, that's qgis... and that's more than enough, as it's already collecting a whole bunch of packages:
Cleaning up#
If things go wrong, perhaps due to a botched upgrade or conflicting repositories, you may need to clean up your system before retrying.

Remove QGIS:
If you’ve experimented with ubuntugis or other repositories, remove potentially conflicting dependencies:
Then, clean up lingering repository references:
Now, you're ready to restart the installation process from the beginning.