A new, open-source biodiversity widget developed by French National Parks and recognized internationally.
It allows to display species observed around any given location.
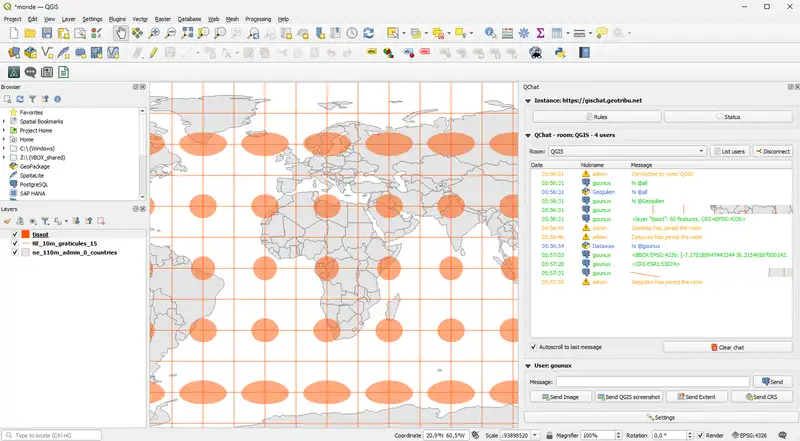
After a somewhat shaky first version, Geotribu is pleased to announce some fairly significant and impactful changes to QChat, the chat system integrated into QGIS.
The new version of QChat is a bit like when Com Truise gets on a motorbike: it really gets the blood pumping!
Mid-June, the French-speaking QGIS Users Meeting was held in Avignon, Southern France - a city often described as "the City of the Popes", thanks to the Popes' Palace, the city's number one attraction. Not far from the non-terminated bridge, which has inspired some happy songs around the world as well as the 2025 edition banner :
Since the last Geotribu article about deploying QGIS Server dates back to 2010, the release of an official QGIS Server Docker image last year is a great opportunity to catch up!
As a quick reminder, QGIS Server is an open-source web mapping server solution—similar to GeoServer or MapServer—that allows you to serve maps and geospatial data on the web. It relies on OGC (Open Geospatial Consortium) standards to provide interoperable services. QGIS Desktop offers a graphical interface for users to create and edit their maps.
The official QGIS Server documentation explains in detail how to install QGIS Server natively, i.e. directly from your platform or distribution’s package repositories. After the official QGIS Server image was released last year, Anita Graser shared a great post about its usage. However, comprehensive resources on containerized deployment remain limited. That’s why in this article, we’ll take a look at how and why using the official QGIS Server Docker image makes deployment much easier.
As part of a personal project, I wanted to store a large part of the INSEE's french census data in a PostgreSQL database with multi-millennial tables. The problem is that, within the same dataset, the fields can change over the years, which makes it impossible to create a fixed table structure. The solution? Use semi-structured data, i.e. store this data in JSON in a table field. This article is a summary of that experience.
Unscheduled obsolescence
This work was carried out before the release of PostgreSQL 17, which adds important features for JSON with JSON_TABLE, so it won't be mentioned here.
Since we're going to be talking about JSON and semi-structured data, I feel obliged to start this article with a warning.
The relational model is good, eat it up, and integrity constraints were invented for good reason.
This article is not intended to be an invitation to go into YOLO mode on data management: “all you have to do is put everything in JSON” (like a vulgar dev who would put everything in MongoDB, as the bad tongues would say).
QGIS.бг is an informal organization that brings together the Bulgarian FOSS geo enthusiasts. In the landscape dominated by proprietary software, the QGIS.bg is providing learning materials at beginner and advanced level, in Bulgarian language, for free to anyone who wants to know more about open source GIS and technologies.
It may sound surprising, but installing the most widely used open-source GIS software on the most popular Linux distribution is still not as seamless as it should be. Even experienced users sometimes struggle with repository configurations, package dependencies, authentication keys and other system administration intricacies.
The challenge isn't just technical. QGIS's official installation documentation, while thorough, can be difficult to navigate for those who aren't developers or seasoned Linux users. Plus, regular updates and changes in the software lifecycle can introduce unexpected hurdles for everyday users.
That said, there's no point in complaining, it’s free software and open-source contributors deserve appreciation, not frustration! And I speak from experience.
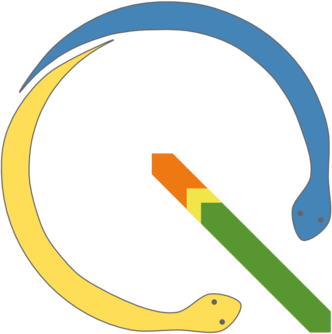
Before we start talking about GIS and technical aspects, let's talk about the Vendée Globe.
It is a solo sailing race, non-stop and without assistance, around the world. It has been held every 4 years since 1989. The start is in Les Sables d'Olonne. The course consists of going down the Atlantic, then passing successively under Africa and the Cape of Good Hope, under Australia and Cape Leeuwin and finally under South America and Cape Horn, to return to Vendée as quickly as possible. The record was set by Armel Le Cléac'h during the 2016-2017 edition with a journey of 74 days 3 hours and 35 minutes.
Anyone who has tried it, knows that configuring a Python, PyQGIS, and PyQt environment on Windows for developing QGIS plugins is a real challenge. Often, it feels like a losing battle...
Well, not anymore! After scouring the depths of the internet and exploring tips provided by Julien, here is one method to have (almost) all the auto-completions for PyQGIS, PyQt and more in VS Code.